openEuler Installation Using virt-install
Installation Procedure (AArch64)
Environment Information
Host environment: openEuler release 20.09
Virtual machine (VM) ISO: openEuler-20.09-aarch64-dvd.iso
ISO file download address:
https://repo.openeuler.org/openEuler-20.09/ISO/aarch64/openEuler-20.09-aarch64-dvd.iso
Preparations
Obtain the ISO file, install VM-related components libvirt, qemu, and virt-install on the host, and enable the libvirtd service.
 yum install –y libvirt*
 yum install –y qemu*
 yum install –y virt-install
 systemctl start libvirtd
Install edk2.
yum install –y edk2
Install VNC Viewer on a Windows machine or a machine that can connect to the host and has a graphical user interface (GUI), and set VNC client options.
GUI-based Installation
- Run the following command to use VNC for installation:
virt-install --connect qemu:///system --virt-tpye kvm --vcpus [cpu_num] --memory [memory size] --name [domain name] --cdrom [iso_path] --disk [disk_path_and_parameter] --boot cdrom --network [network] --graphics vnc,listen=0.0.0.0Example:
virt-install --connect qemu:///system --virt-tpye kvm --vcpus 4 --memory 4096 --name sgs-oe-20.09 --cdrom /home/images/openEuler-20.09-aarch64-dvd.iso --disk path=/home/images/test.img,size=50,format=qcow2,bus=scsi --boot cdrom --network network=default --graphics vnc,listen=0.0.0.0- Start another terminal and run the following command to check the VNC port number:
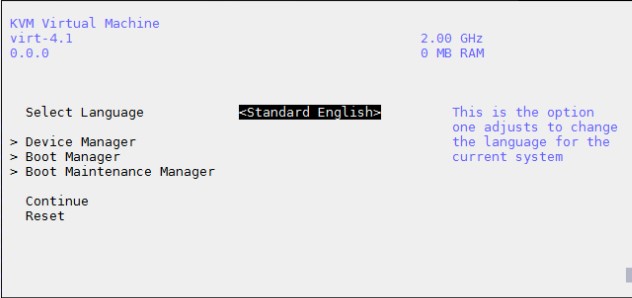
virsh vncdisplay [domain name]- Open VNC Viewer and input [host name:port number] to connect to the host. The following figure is an example.

Note: If the connection fails, run the following commands on the host to enable the port:
firewall-cmd --add-port=[port]/tcp
firewall-cmd --add-port=[port]/tcp --permanent
The value of [port] should be the sum of 5900 plus the port number. For example:
firewall-cmd --add-port=5903/tcp
firewall-cmd --add-port=5903/tcp --permanent
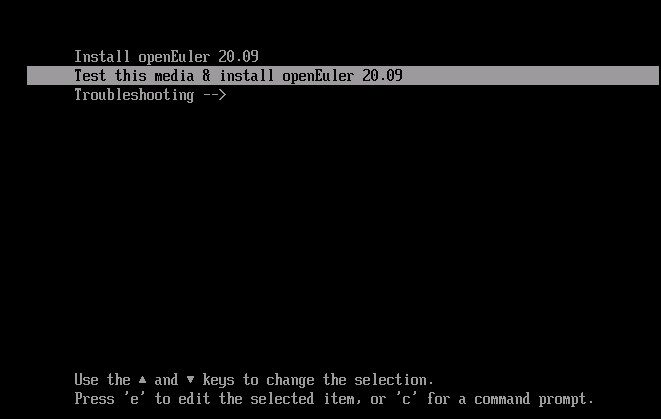
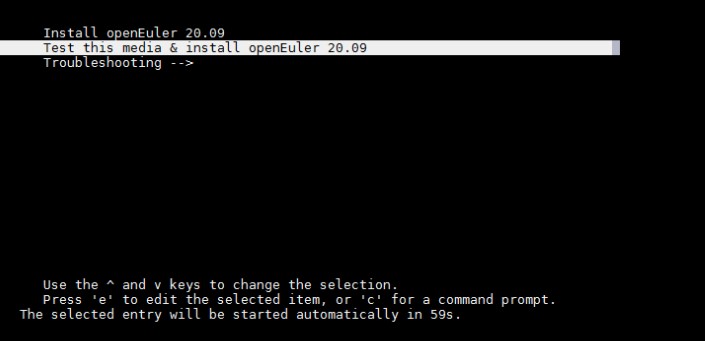
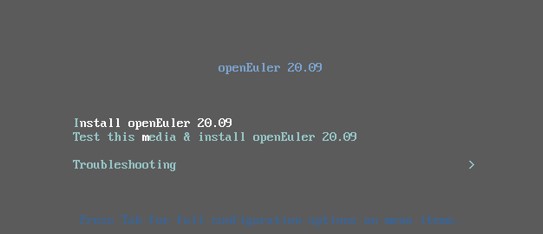
Select Install or Test & Install. The following screen is displayed.
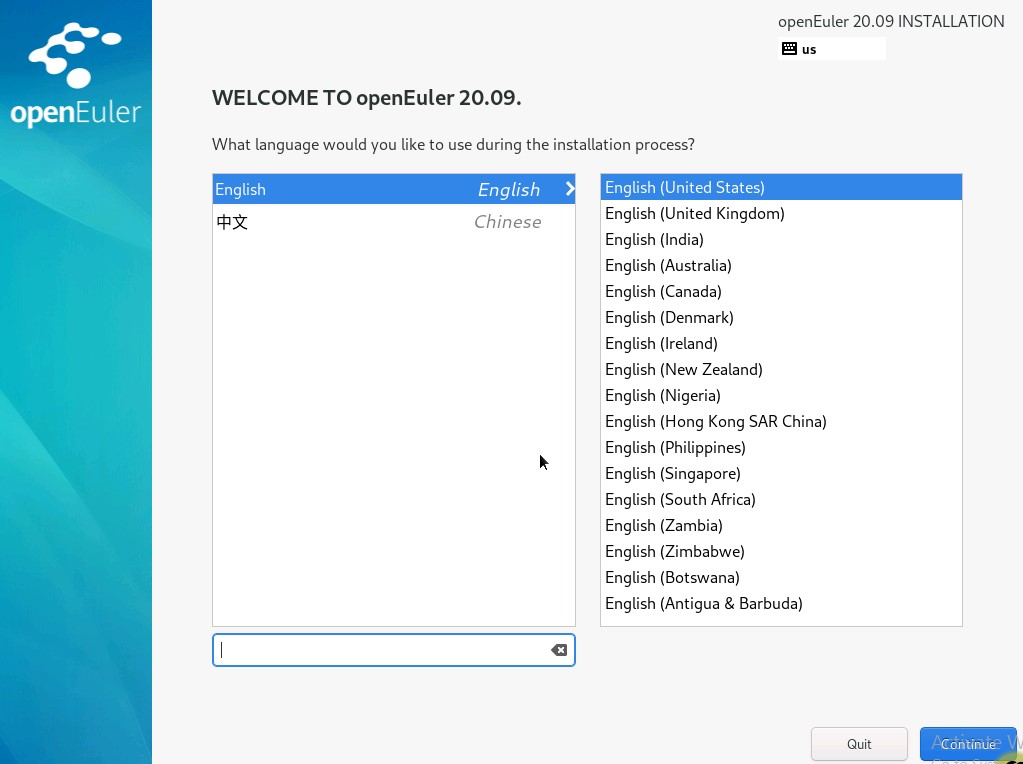
Click Continue.

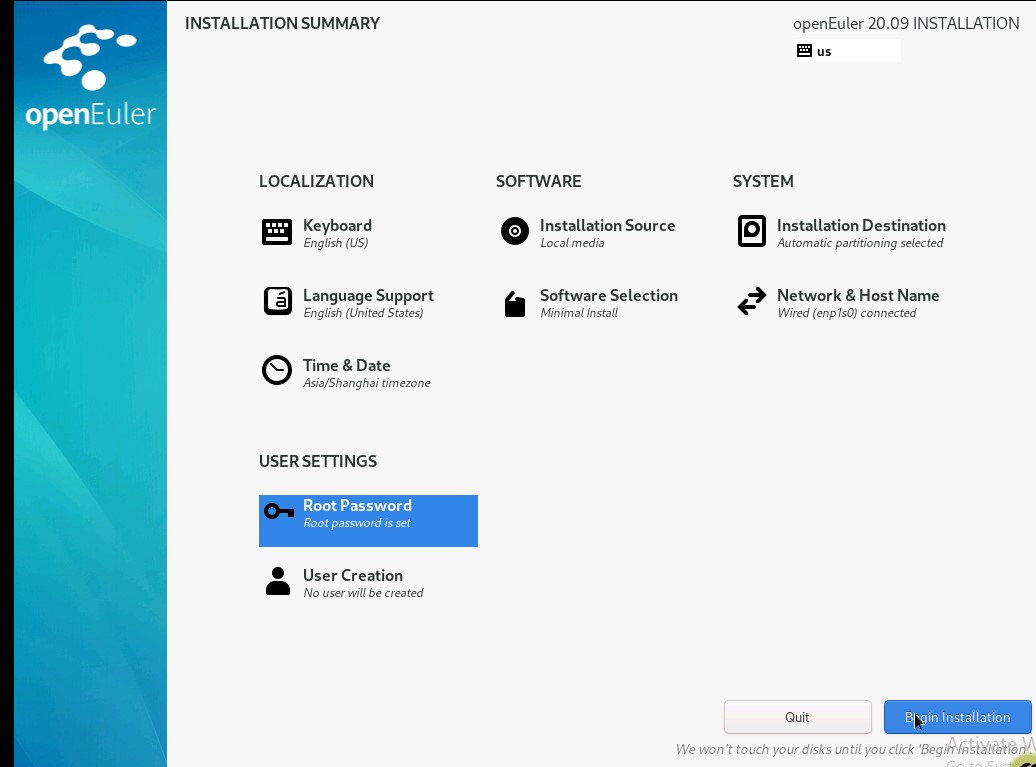
Complete items marked with ! and then click Begin Installation.
 Restart the host after the installation is complete.
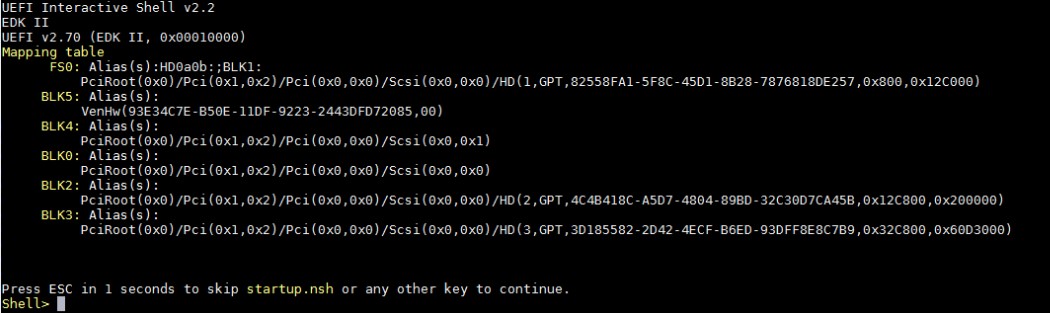
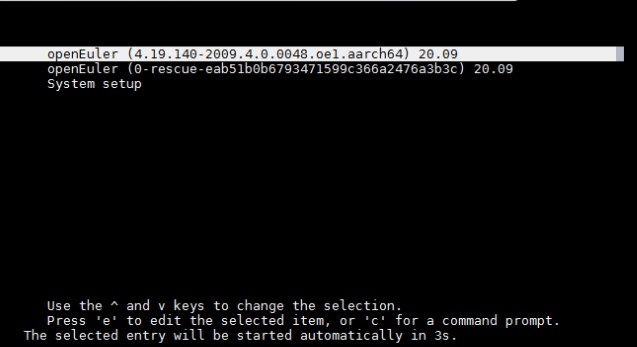
 - The startup mode is set to boot during the installation. After the installation is complete and the system is restarted, the following interface is displayed. Input exit to exit the console.
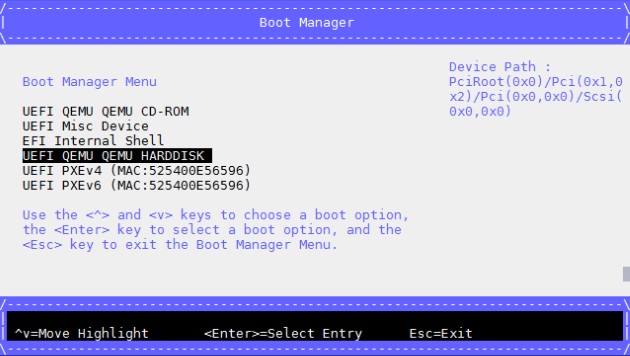
- Go to the BIOS screen, select Boot Manager > UEFI QEMU QEMU HARDDISK as the system boot mode.
- Restart the system. The installation is complete.
CLI–based Installation
- Run the following command to use VNC for installation:
virt-install --connect qemu:///system --virt-tpye kvm --vcpus [cpu_num] --memory [memory size] --name [domain name] --cdrom [iso_path] --disk [disk_path_and_parameter] --boot cdrom --network [network]Example:
virt-install --connect qemu:///system --virt-tpye kvm --vcpus 4 --memory 4096 --name wx-oe-20.09 --cdrom /home/images/openEuler-20.09-aarch64-dvd.iso --disk path=/home/images/test.img,size=50,format=qcow2,bus=scsi --boot cdrom --network network=default- Type e to enter the edit mode.
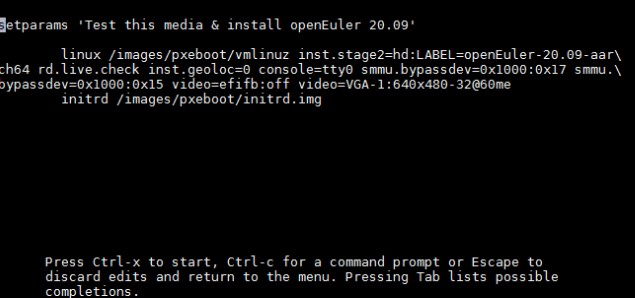
Modify the console. Set console=ttyAMA0,115200,tty0.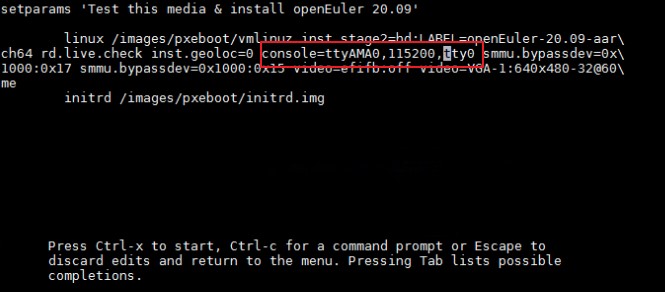
After the modification, press Ctrl and X to start the installation.
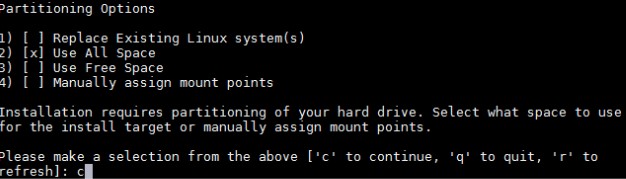
- Select 2) Use text mode.

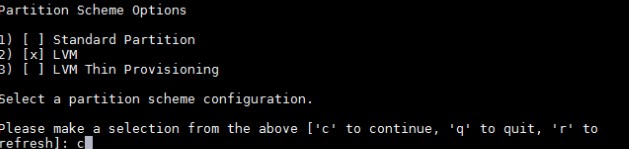
- The installation starts. Items marked with ! need to be customized.
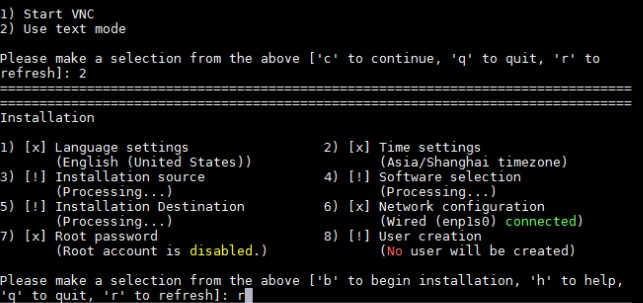
Type r to refresh the status of items under processing.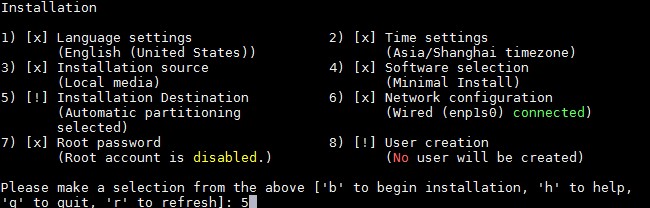

- Set the password of the root user.
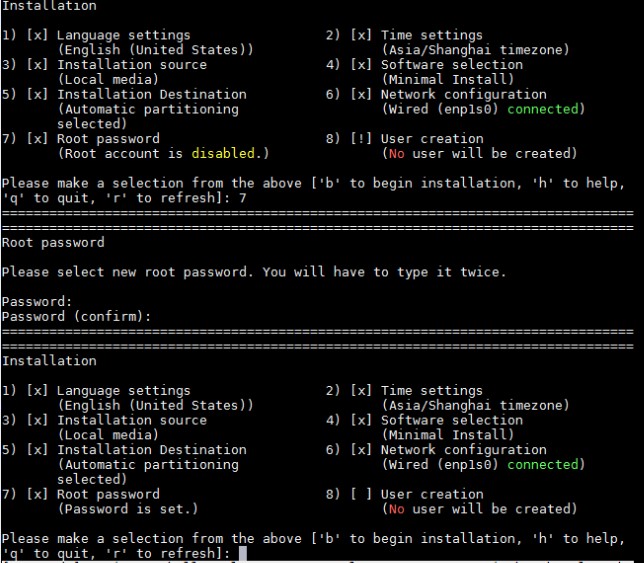
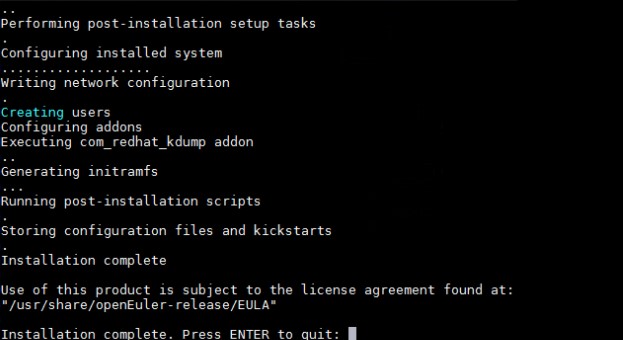
- After the preceding settings are complete, type b to start the installation.

- The startup mode is set to boot during the installation. After the installation is complete and the system is restarted, the following interface is displayed. Input exit to exit the console.
- Go to the BIOS screen, select Boot Manager > UEFI QEMU QEMU HARDDISK as the system boot mode.
- Restart the system. The installation is complete.
Installation Procedure (x86_64)
Environment Information
- Host environment: openEuler release 20.09
- VM ISO: openEuler-20.09-x86_64-dvd.iso
- ISO file download address:
https://repo.openeuler.org/openEuler-20.09/ISO/x86_64/openEuler-20.09-x86_64-dvd.iso
Preparations
Obtain the ISO file, install VM-related components libvirt, qemu, and virt-install on the host, and enable the libvirtd service.
 yum install –y libvirt*
 yum install –y qemu*
 yum install –y virt-install
 systemctl start libvirtd
Install edk2.
yum install –y edk2Install VNC Viewer on a Windows terminal or a terminal that can connect to the host and has a graphical user interface (GUI), and set VNC client options.
GUI-based Installation
- Run the following command to use VNC for installation:
virt-install --connect qemu:///system --vcpus [cpu_num] --memory [memory size] --name [domain name] --cdrom [iso_path] --disk [disk_path_and_parameter] --boot cdrom --network [network] --graphics vnc,listen=0.0.0.0Example:
virt-install --connect qemu:///system --vcpus 4 --memory 4096 --name wx-oe-20.09 --cdrom /home/images/openEuler-20.09-x86_64-dvd.iso --disk path=/home/images/test.img,size=50,format=qcow2,bus=virtio --video virtio --boot cdrom --network network=default --graphics vnc,listen=0.0.0.0Start another terminal and run the following command to check the VNC port number:
virsh vncdisplay [domain name]Open VNC Viewer and input [host name:port number] to connect to the host. The following figure is an example.
Note: If the connection fails, run the following commands on the host to enable the port:
    firewall-cmd --add-port=[port]/tcp
    firewall-cmd --add-port=[port]/tcp --permanent
The value of [port] should be the sum of 5900 plus the port number. For example:
    firewall-cmd --add-port=5903/tcp
    firewall-cmd --add-port=5903/tcp --permanent
- Select Install or Test & Install. The following screen is displayed.
Click **Continue**. Complete items marked with ! and then click **Begin Installation**. Restart the host after the installation is complete. Start another terminal and shut down the newly installed VM.
virsh destroy [domain name]Change the VM boot mode from boot dev='cdrom' to boot dev='hd'.
virsh edit [domain name]Restart the VM.
virsh start [domain name]Use VNC Viewer to connect to the VM again and ensure that the VM is restarted successfully.


